
Are you looking for a simple technique to learn how to make paper flowers? Would you like to save some money and have fun creating your own floral decorations?
I will help you.
As a florist, my job involves more than just creating bouquets. There’s also a significant element of creativity and imagination in offering unique designs that stand out.
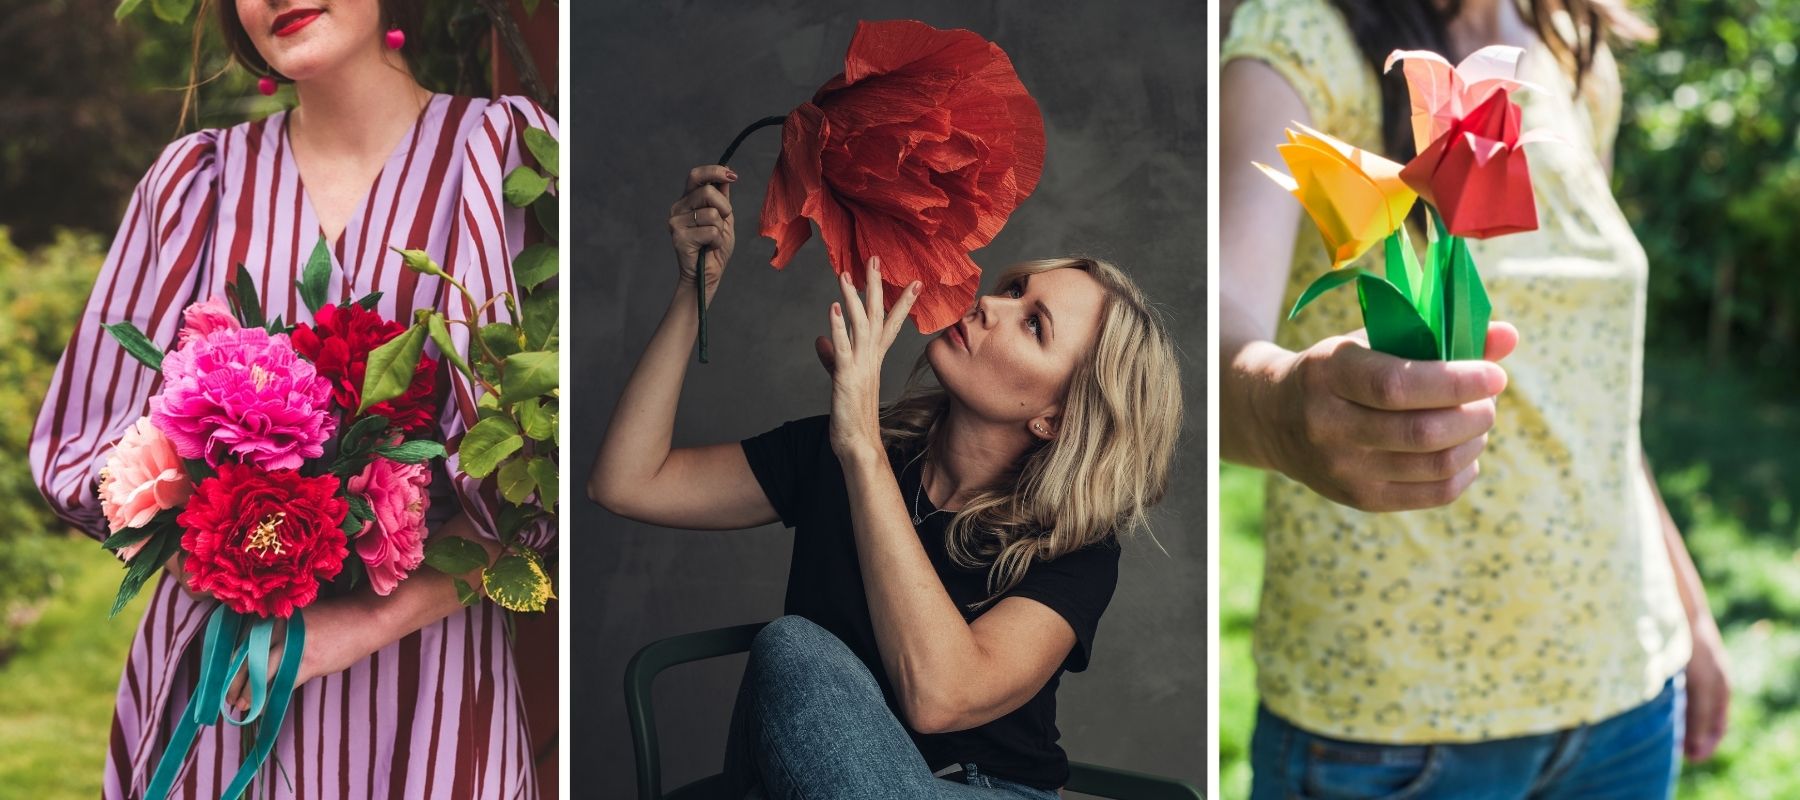
Today, I’m excited to share one of the many variations on the theme of flowers that I’ve learned to create: paper flowers. In this article, I’ll provide you with several tutorials that you can make your own to create a decoration that truly reflects your style!
To create paper flowers, it’s important to draw inspiration from real flowers, observe them closely, and understand how they are structured in order to recreate them. For instance, to make a blooming peony, you can use paper napkins and fold them in an accordion style. You can also use the Japanese art of origami, which allows you to create flowers by simply folding paper. Additionally, you can carefully replicate flowers like roses by gluing together paper petals one by one.
Want to learn more? Keep reading to find out:
- The list of materials you’ll need to create your flowers
- A step-by-step tutorial with clear and practical explanations
- Videos to guide you through each step of the DIY process
- Creative inspirations: paper rose, origami, paper flower crown…
What supplies do you need?
Before diving into the main topic, I’ve put together a handy list of supplies you’ll need for this DIY project. Want to save some money? This first section concludes with a list of items you can gather without spending a dime. Pretty convenient, right? 😉
The Tools
- Some scissors
- A glue gun and glue sticks
- A pencil and an eraser
What You Can Buy
- Some string if you don’t have any
- Some glue
- Materials to create the stems for your flowers: colored aluminum wire, wooden stakes, etc.
- Some paint if you want to paint your flowers after making them
What You Can Recover
- Some napkins
- Bits of ribbons, string, etc.
- Pretty colored papers: tissue paper, gift wrap
- Materials to create the stems for your flowers: twigs, already used plant stakes, etc.
How to Make Paper Flowers: A Step-by-Step Tutorial
There are several techniques to create beautiful flowers, as we will explore throughout this article. To begin, I suggest we draw inspiration from this video that offers a simple method that yields very lovely results:
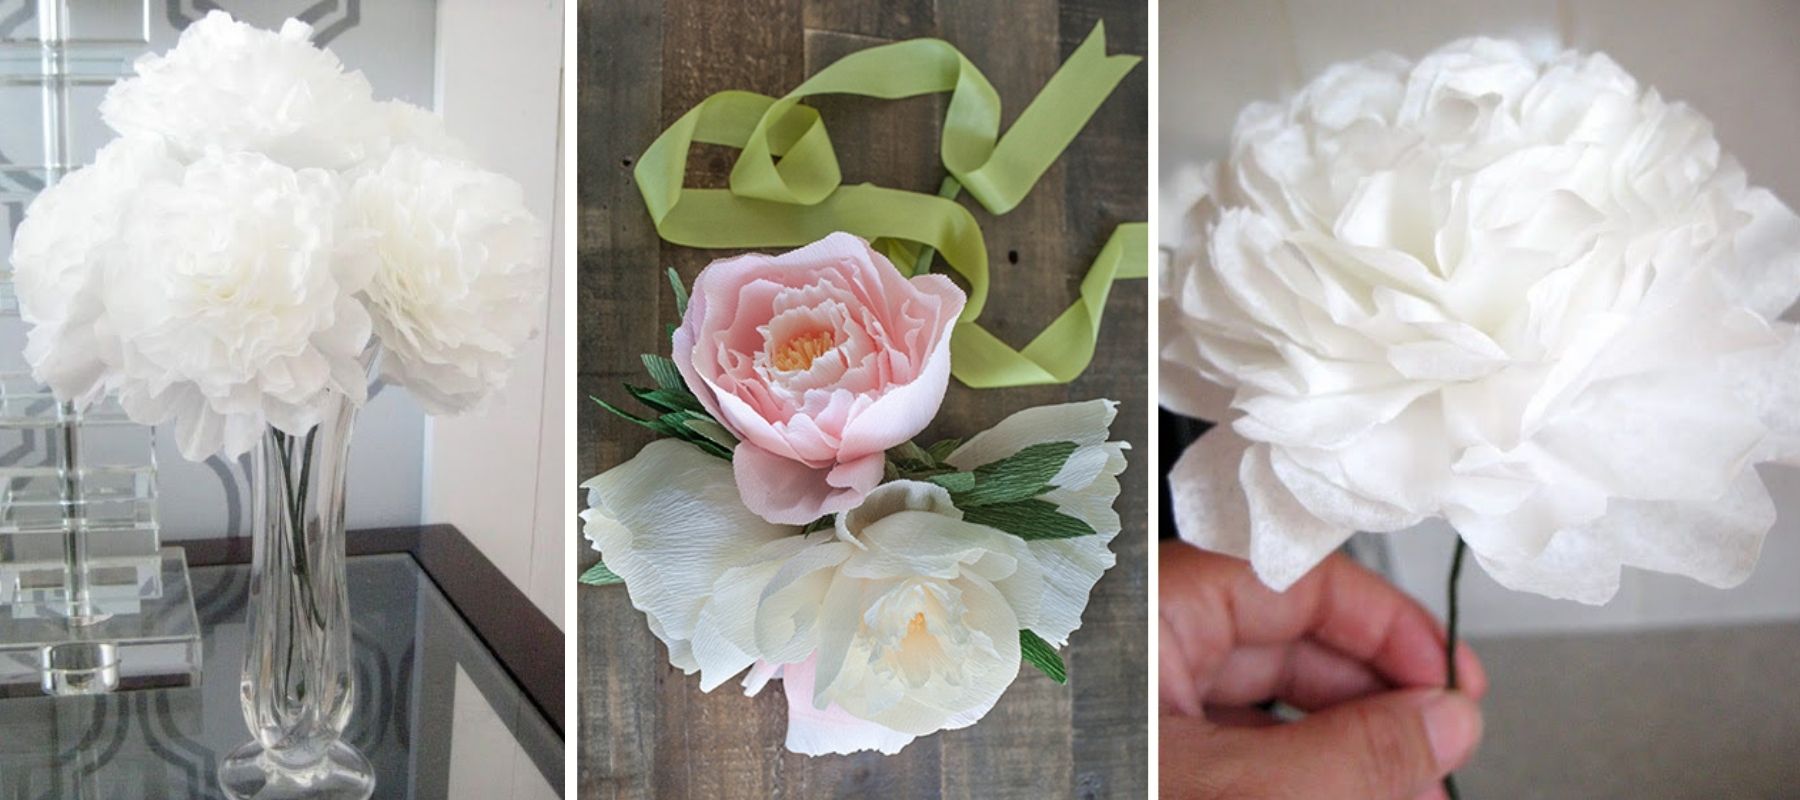
Step 1: Preparing the Materials
For this DIY project, which allows you to create a flower that resembles a Peony, you will need paper napkins. You can choose solid colors or patterned ones, depending on your preference:
- Together, they create a more realistic illusion of a real flower,
- With patterns, you can design a more unique decor that complements your interior.
To begin, unfold one layer of your paper towel and place the resulting rectangle on a clean, clear workspace. Stack two paper towels in this manner.
Step 2: Folding
Continue by placing the smallest side of the rectangle facing you. Fold this side like an accordion along the entire length of the longer side, as you can see in the video. You should achieve a result that resembles a fan.
Once you’ve done this, fold the result in half and tie a piece of string around that spot so that your initial fold (the fan) stays secure and doesn’t come undone.
Step 3: Outlining and Cutting the Shapes
The resulting thin rectangle (with a string in the center) is a bit too angular to create a flower: it will be necessary to round the ends of it, meaning its shorter sides.
You can follow the steps shown in the video by first rounding the corners on these sides, then carefully cutting them out to create a half-circle.
Step 4: Shaping the Flower
It’s time to get down to business! From this moment on, you can start to gently unfold the flower to give it some volume:
- Spread the napkin layers apart to form a circle on your table,
- Lift and separate the different layers of the napkin to create a half-ball,
- For a more natural look, feel free to crumple the paper napkins a bit.
The Shaft Attachment
Once you have your flower, you can attach it to a pretty branch that you have either painted or left natural. To do this, turn your flower so the flat side is facing you, and apply glue to the center of it. Then place the flower on the branch, allowing it to sit for several minutes to let the glue adhere.
👉 If you’d like, you can use a hot glue gun for this step: hot glue dries much faster, and the gun allows for more precise application. 😊
Let Your Imagination Run Wild by Creating New Patterns!
The technique I just presented to you is a simple and quick foundation for creating paper flowers. However, in nature, flowers are distinguished by their incredible variety of shapes, sizes, and colors.
To achieve a natural look, feel free to mix different shades, vary the sizes of your flowers, and also experiment with the folds. This video offers some additional ideas that you can certainly make your own:
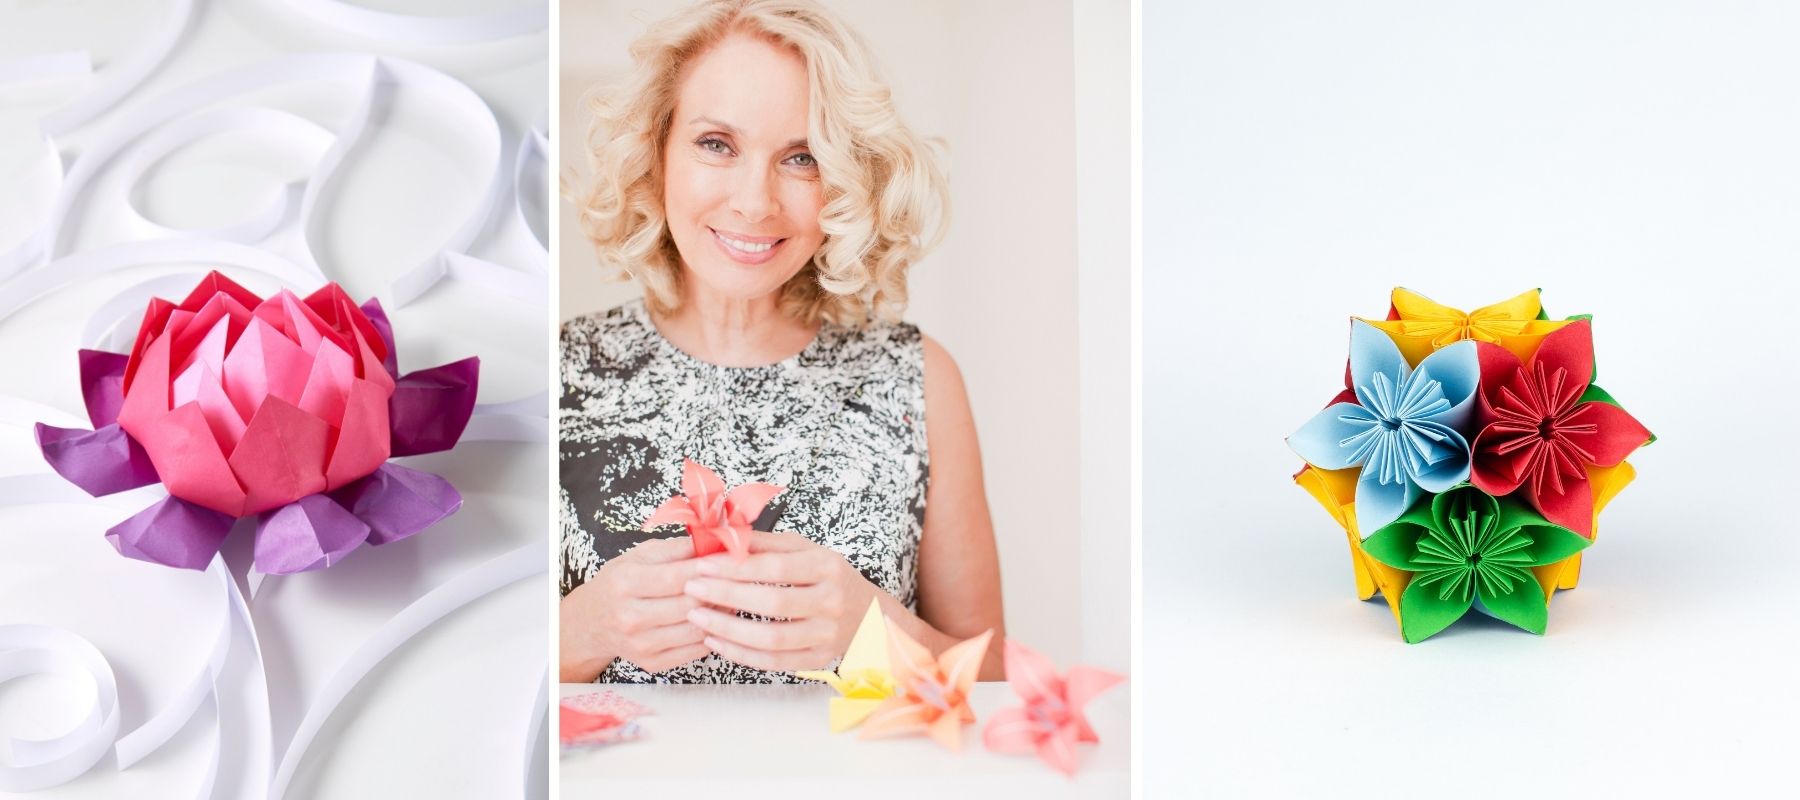
Origami: A Relaxing and Creative Activity for Making Paper Flowers
Are you interested in paper folding? In that case, you can draw inspiration from the Japanese origami technique. This ancient art of paper folding requires no cutting, gluing, or ties. When practiced with care, it can be a source of relaxation and focus.
The goal is to create shapes using minimal supplies. Thus, the Japanese word “origami” reflects the simplicity of this technique:
- 折る (Oru) means “to fold” or “to bend,” and it has given rise to the term: ORI.
- 紙 (Kami) means “paper,” and it has given rise to the term: GAMI.
Would you like to make an origami flower? There are plenty of video tutorials and books that will guide you through the process step by step.
To get started, you can practice by creating a lily, as shown in this video:
Check Out a DIY Video Specifically for Roses
Would you like to create paper roses to decorate an event, your home, or to give as a gift?
It is true that these beautiful flowers are a true source of creative inspiration. However, because their numerous petals are evenly arranged around their center, these flowers are difficult to create with simple folding techniques. To make a rose, it is therefore more effective to start with the natural structure of the flower, creating a narrower center and surrounding it with more open petals.
Here is a simple video technique to help you gain more clarity:
With just a few simple supplies like toothpicks, paper, scissors, and glue, you can create beautiful paper roses.
👉 You can even lightly scent them to make them look even more realistic and pleasantly surprise those who take a closer look!
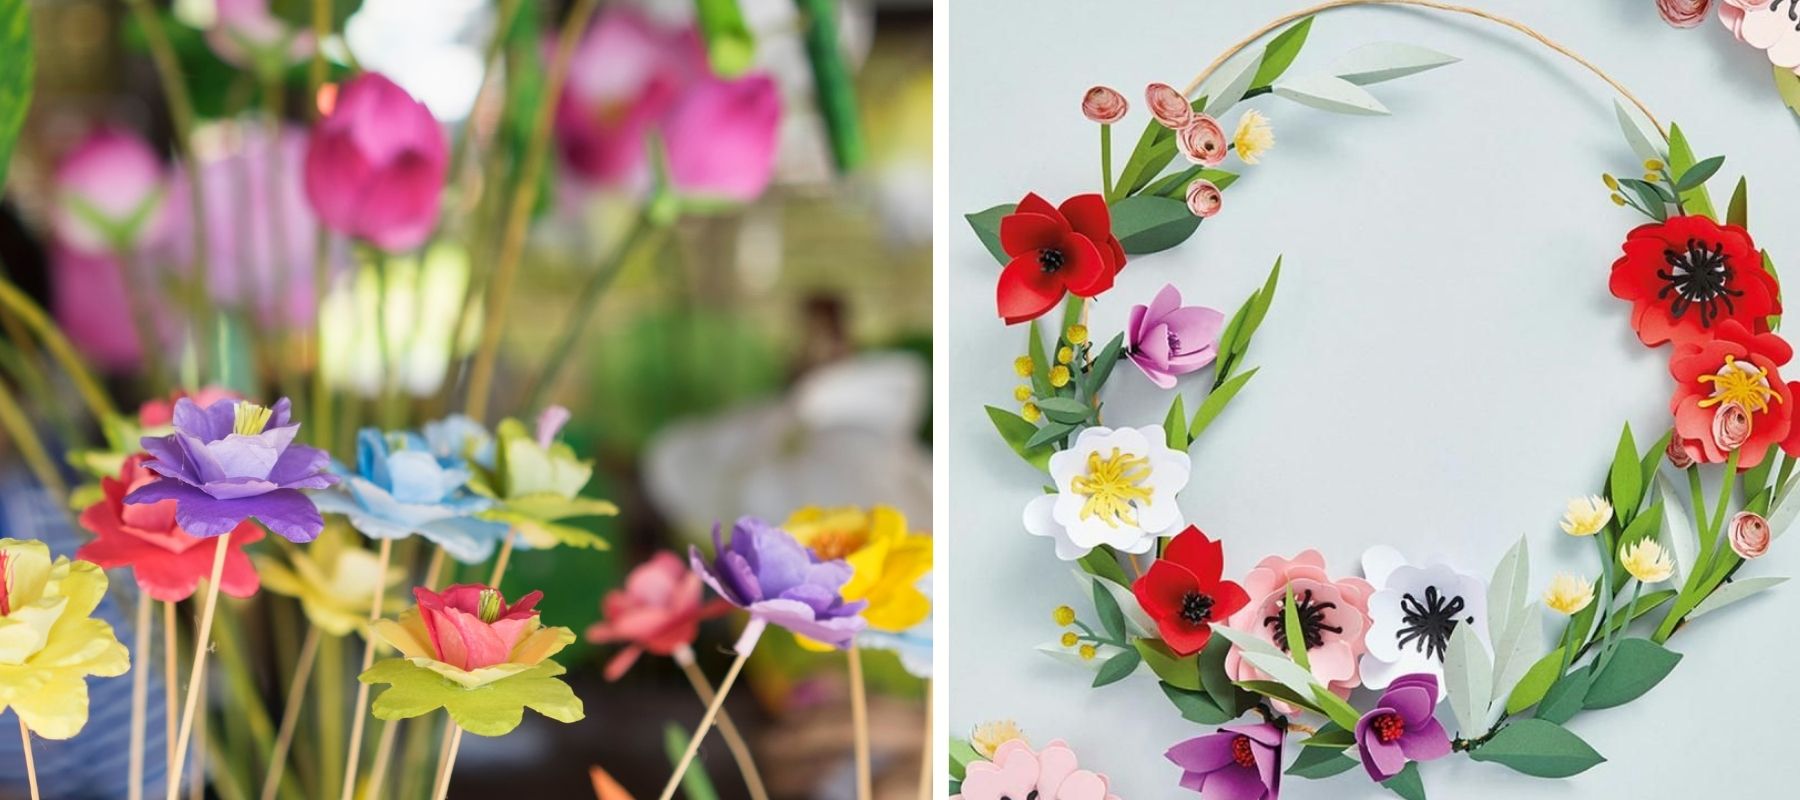
DIY Idea: Learn How to Create a Paper Flower Wreath!
Once you get a taste for making paper flowers, it’s hard to stop. It’s a very enjoyable activity that allows you to quickly create a wide variety of different floral designs. But the question arises: what to do with all those flowers?
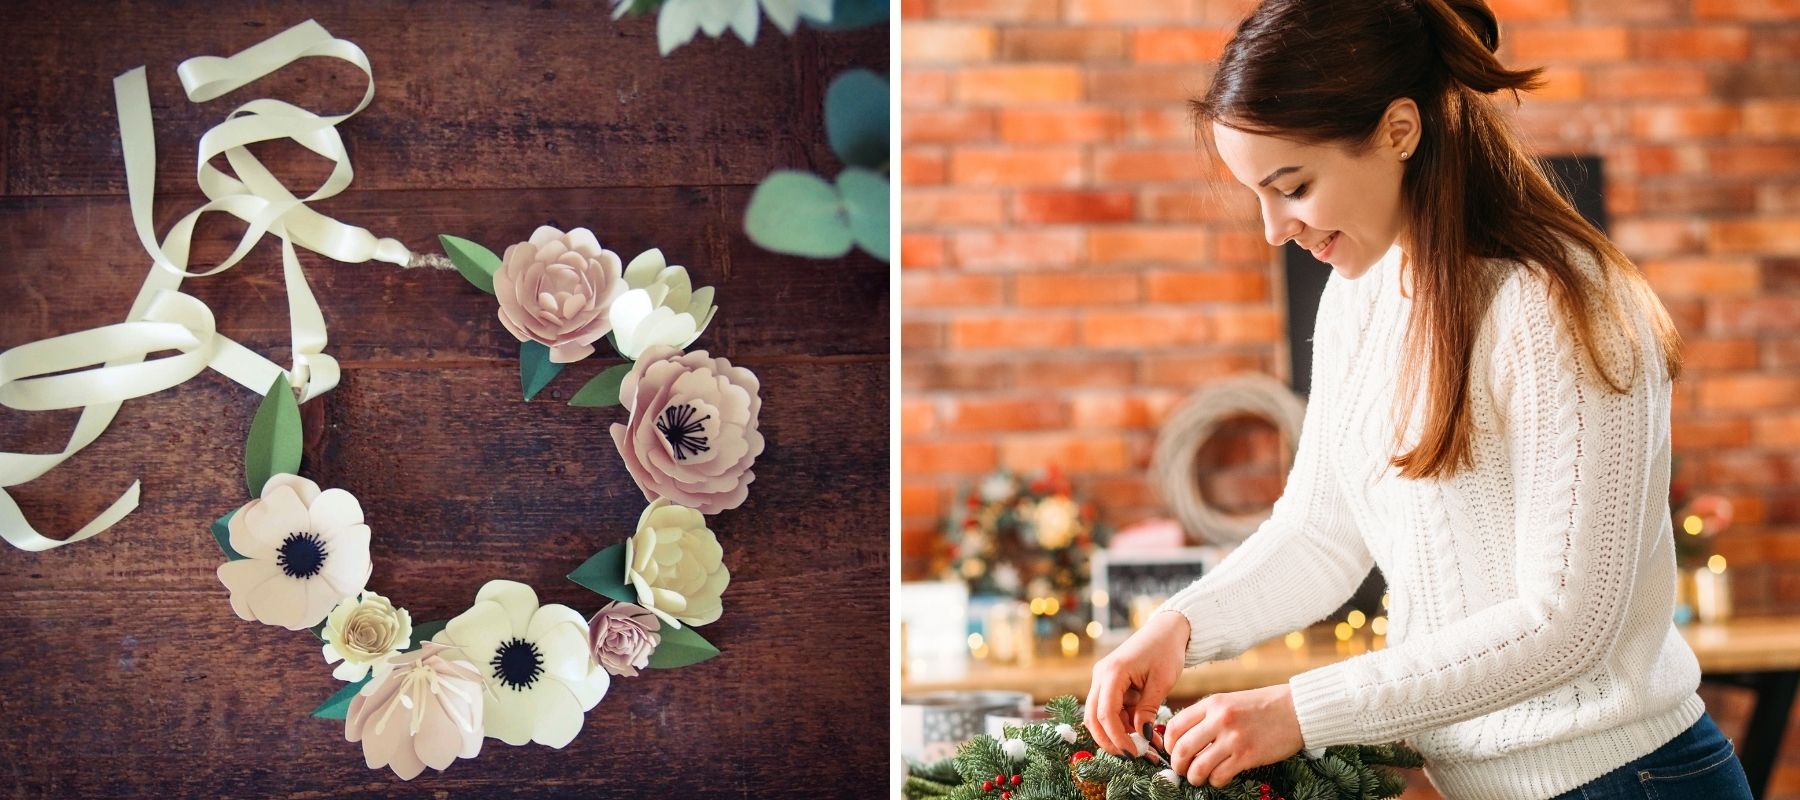
Here’s an idea: you can combine them to create a flower crown! This way, you’ll make an accessory that you can wear or give as a gift to a little girl or a young woman.
The technique is quite simple: you just need to glue your paper flowers onto a colorful ribbon, making sure beforehand that it fits around your head (leave some extra length for the knot to hold it in place).
👉 Looking for a beautiful flower crown to wear for a special event (wedding, birthday, party…)? Check out this trendy bohemian hairstyle with our collection of flower crowns for adults and for children. These high-quality synthetic floral tiaras are perfect for pairing with a boho-chic outfit, for example.

🎄 You can also glue your paper flowers onto a Christmas wreath, for example, to create a unique and DIY decoration for your home during the holiday season!
You now have all the information you need to create beautiful paper flowers and unique decorations from them. Don’t hesitate to practice: your flowers will become more and more lovely over time, and you’ll quickly master more complex techniques!
Want to discover more décor items inspired by nature? Check out our specialized online store!