Do you want to learn how to make your own flower bracelet for a special occasion? Are you a future bride or bridesmaid looking to create your own bracelet?
Here is a detailed tutorial to assist you.
As a florist specializing in events, I am responsible for designing all the floral decorations for my clients’ weddings. This includes creating floral arrangements such as flower crowns, boutonnieres, and floral bracelets.
In this article, I’m going to share my knowledge with you and provide some pro tips to help you easily create your floral bracelet.
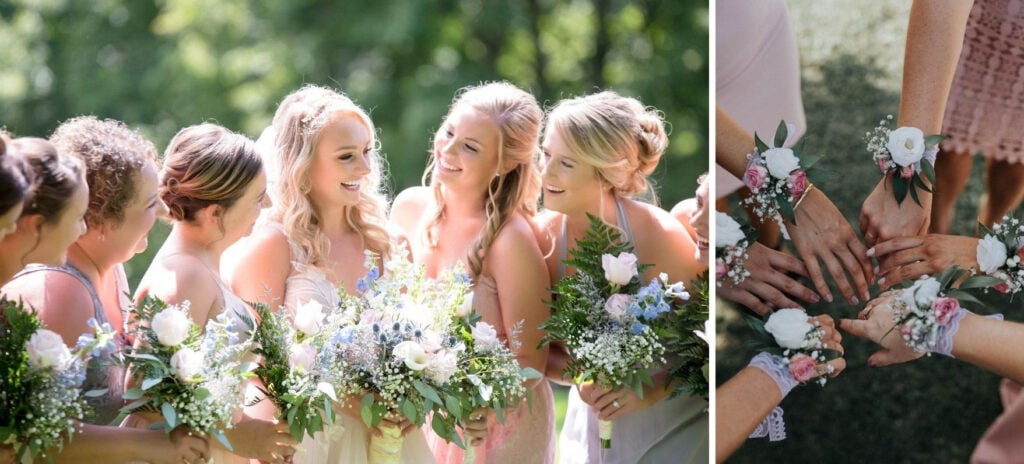
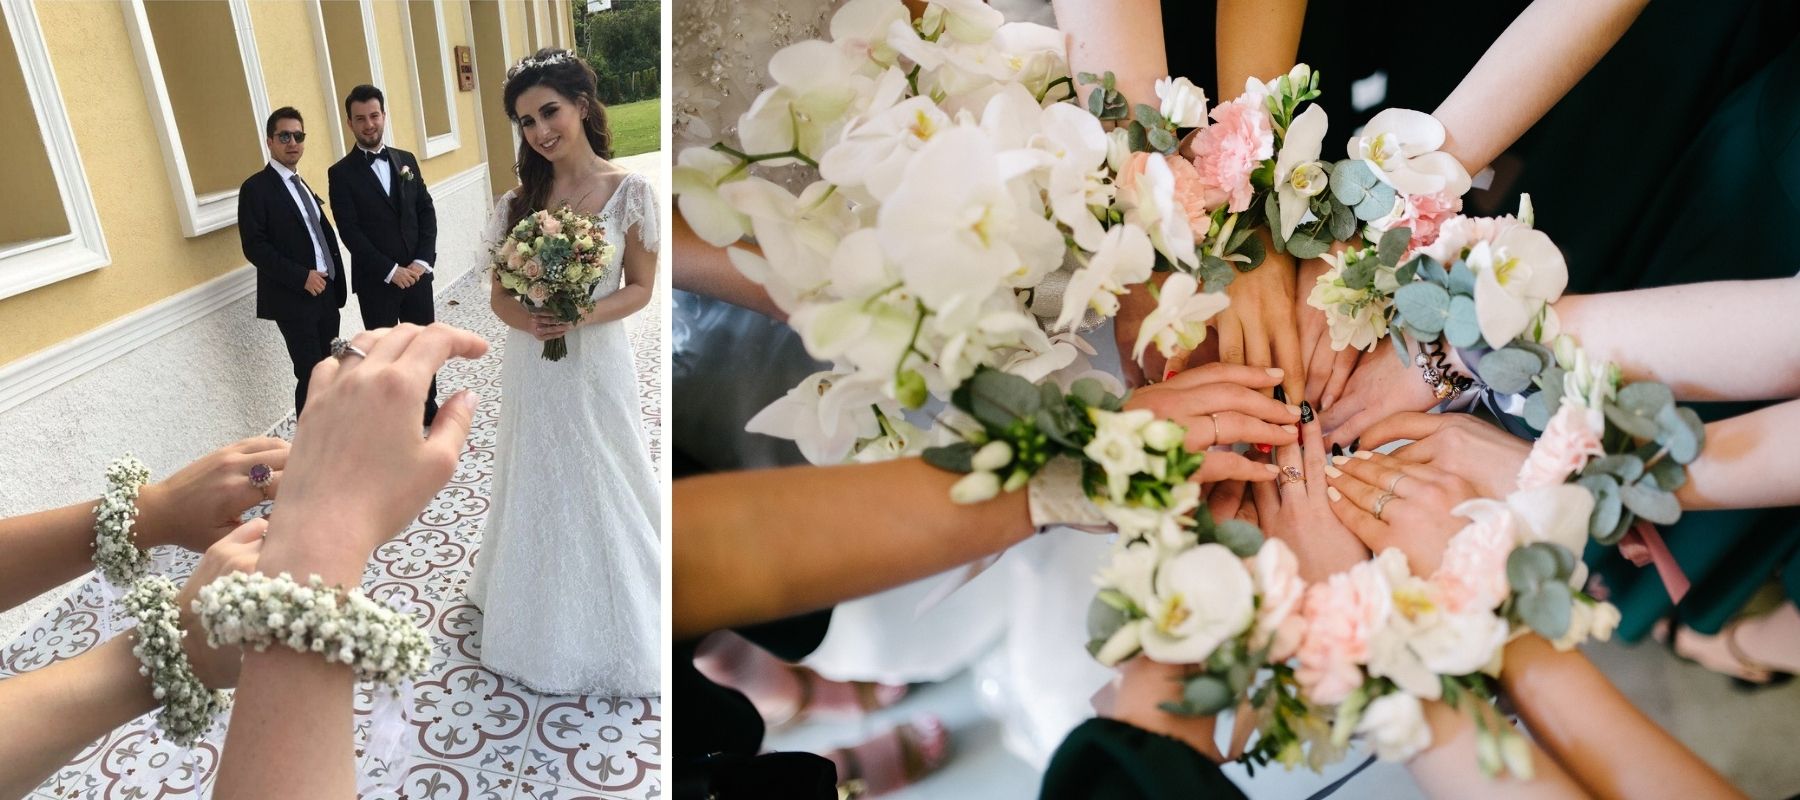
This type of jewelry is traditionally worn at weddings, by bridesmaids and female witnesses. It is one of the easiest floral accessories to create: you just need a ribbon, glue, scissors, and suitable greenery. For the flowers, you can choose small blooms like Spray Roses, Waxflower, Hydrangeas, or Baby’s Breath. Appropriate foliage for this project includes Ivy, Pittosporum, or Asparagus Fern. If you want to get a head start, you can create a bracelet using dried or preserved botanicals, which you can gather yourself or purchase from your florist.
Want more details? Check out this comprehensive tutorial to explore:
- What a floral bracelet is, the occasions it’s worn for, and who typically wears it
- A list of materials and supplies needed for making one
- A selection of ideal flowers for floral jewelry creations
- A step-by-step tutorial to guide you in making it
- Ideas for pairing your bracelet with other floral accessories
What is a Floral Bracelet?
Less well-known than the bridal bouquet or boutonniere, floral bracelets are delicate accessories that have become increasingly popular in recent years.
They can be made with dried, preserved, or fresh flowers. In the case of fresh flowers, the bracelet should be crafted the night before or on the same day as the event it will be worn for. Freshly cut flowers used in the creation will wilt quickly, especially if they are exposed to high heat or adverse weather conditions.

When do we wear this type of bracelet?
This piece of jewelry is worn during ceremonies, especially at weddings. It serves as a subtle reminder of the bridal bouquet. It should complement both the outfit of the person wearing it and the bride’s attire.
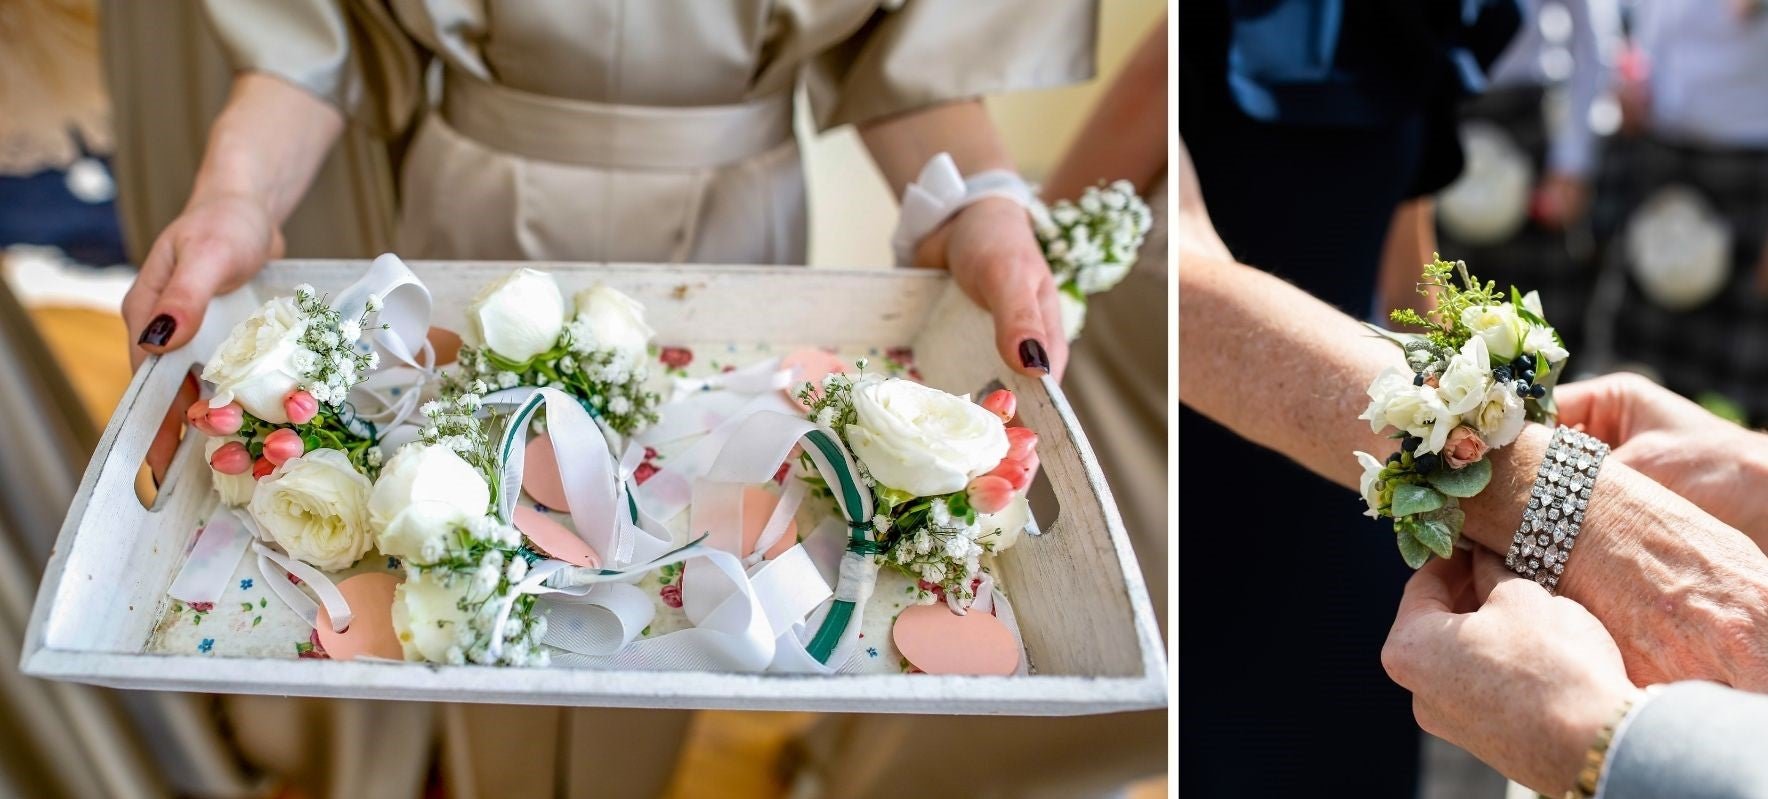
An ornament typically meant for bridesmaids
The corsage is a floral accessory traditionally worn by bridesmaids and female witnesses.
Easy to wear and compact, it is also perfect for highlighting the little girls close to the bride. This floral detail will make them feel like princesses on this special occasion.
What Flowers and Foliage Are Suitable for Making a Bracelet?
Before making a bracelet, you need to gather flowers and foliage, whether by foraging in nature or visiting a florist directly.
To ensure that the wedding decor creates a harmonious look, it’s essential that the bracelet serves as a reminder of the bride’s bouquet and/or hairstyle.
👉 This should also apply to all the other floral accessories for the wedding: bridal party crowns, boutonnières for the groom and groomsmen…
To achieve this, choose small flowers. If your bouquet consists solely of large flowers, you can incorporate small flowers that have a similar color and appearance.
To help you out, you’ll find below a list of small flowers and greenery that you can use to create your bracelet.
Fresh Flowers 🌼
- Waxflower
- Limonium
- Freesia
- Gypsophila
- Branching Mini Roses
- Kalanchoe Flowers
- Lysianthus Buds
- Mini Hydrangea Flowers
- Astrantia
- Ornithogalum
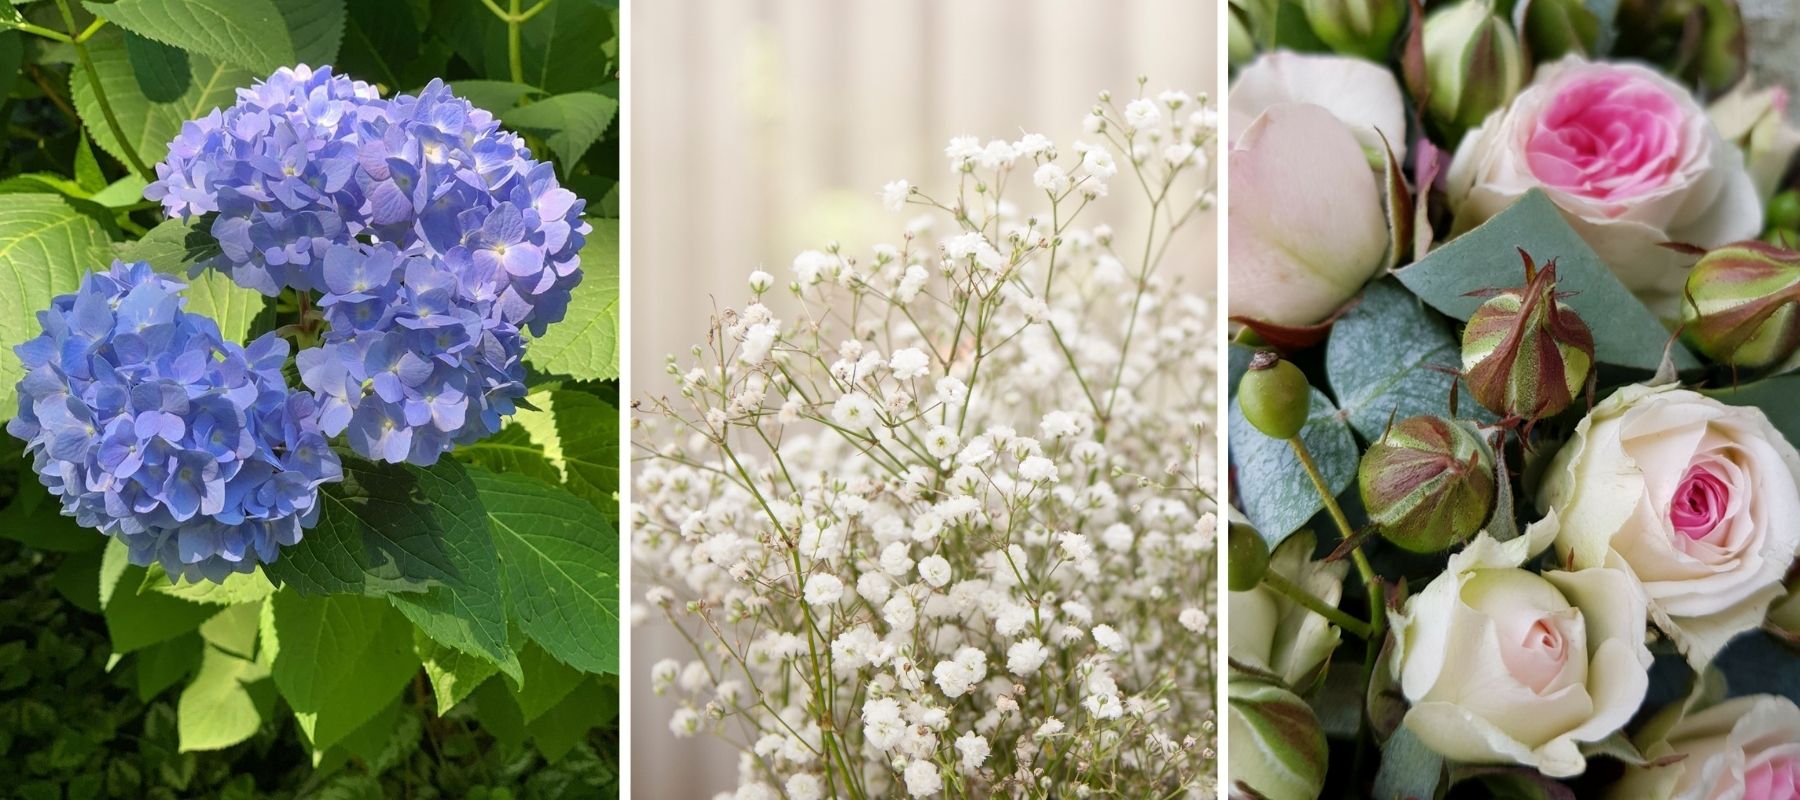
Hydrangea / Baby’s breath / Rose branch variety “Mimi-Eden”
Foliage 🌿
I recommend using them sheet by sheet, with adhesive.
- Ivy
- Eucalyptus
- Pittosporum
- Wax foliage, if you’re using it
- Asparagus
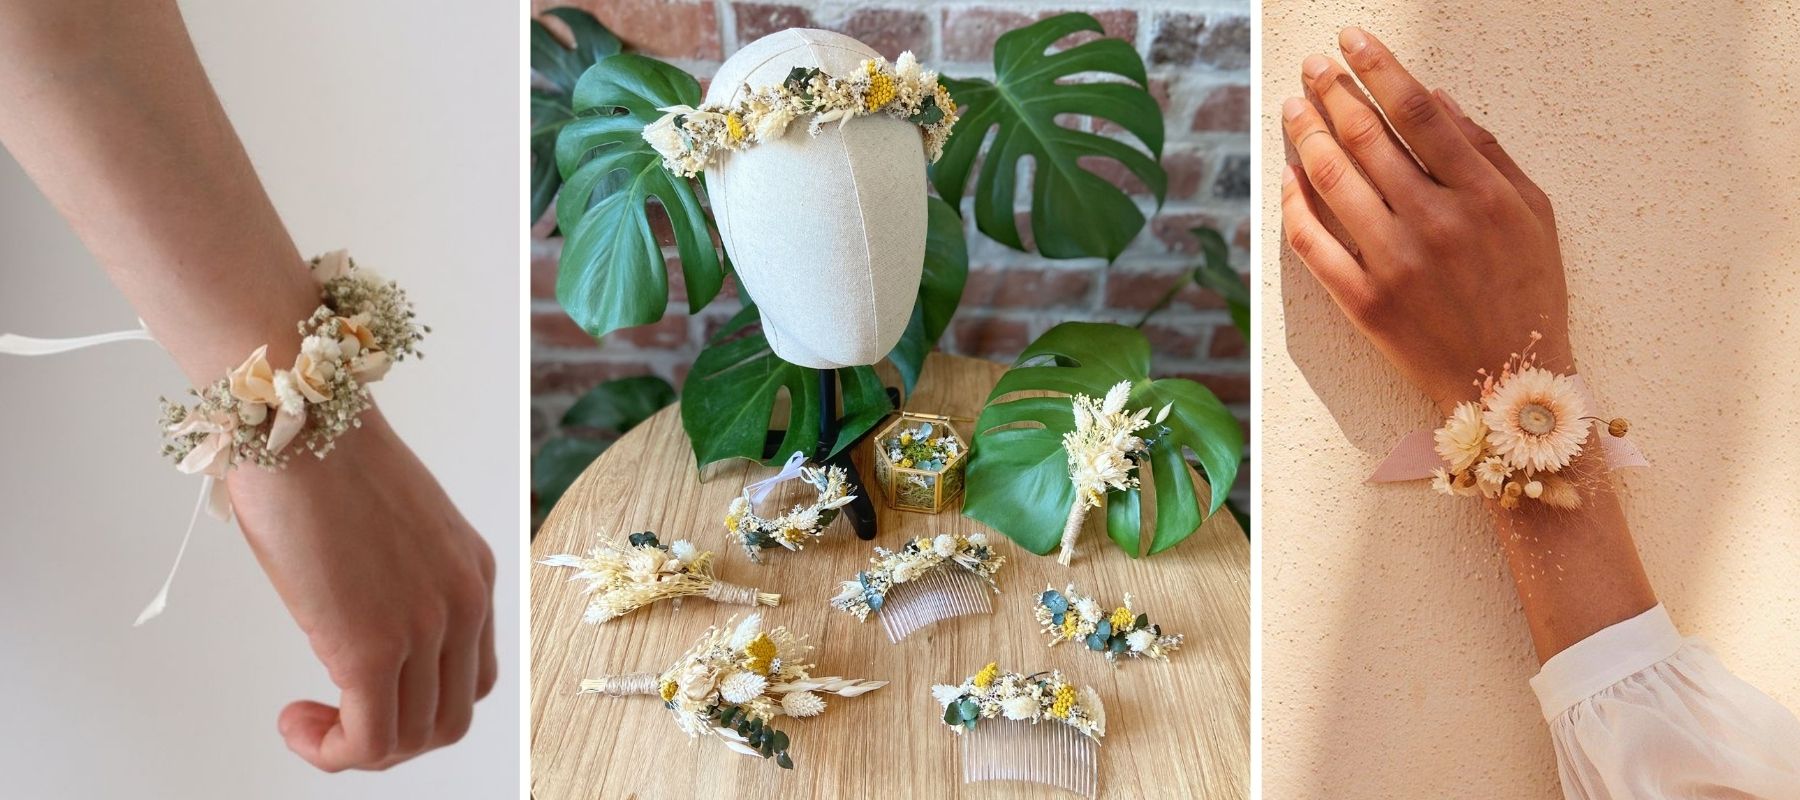
Dried and/or Preserved Flowers 🏵️
These flowers are very convenient because they allow you to make your bracelet in advance. This will be especially helpful if you decide to turn its creation into an activity for the bachelorette party, for example.
Often, there are dyed versions of dried and preserved flowers. This allows you to achieve a unique look, such as with deep blue flowers, for example.
👉 If you choose this option, make sure to order your plants at least a week in advance from your florist. They may not have them in stock in the store every day.
- Immortelles (dried flowers)
- Baby’s Breath
- Hydrangea (to work with small bloom by small bloom)
- Lepidium
- Sea Lavender
- Flax Flower
- Canary Grass
What Equipment Do You Need?
There are several techniques for making bracelets. In this tutorial, I will walk you through the simplest method, which also requires the least amount of specific materials. Here’s what you’ll need to create your jewelry piece.
Ribbon
Choose a ribbon that matches the flowers and is of good quality. It should be wide enough (about 0.4 to 0.8 inches) to allow you to attach your plants. The best options are ribbons made of fabric or lace. It should be sturdy and able to withstand some pulling.
If you prefer not to tie a wide ribbon around your wrist, you can use a thin ribbon for the attachment and a wider ribbon for wrapping around your wrist.
Floral Glue
This is a glue specifically designed for plants and fresh petals.
👉 Always apply it to the item you’re gluing and let it air for 30 seconds before making contact with the surface.
Be careful not to use too much; it could damage the flowers.
A Hot Glue Gun and Glue Sticks
If you plan to create your bracelet using only dried and/or preserved flowers and foliage, you can consider replacing floral glue with hot glue. These materials handle higher glue temperatures much better.
The glue gun will also allow you to bond several ribbons together, especially if you plan to use a wide ribbon for the center of the bracelet and a thinner ribbon for the clasp.
Scissors and Pruners
They are used to cut plants and ribbon. Use the scissors for precise cuts on thin stems and for ribbon. The pruners can be used for thicker stems.
👉 If you feel more comfortable, you can cut small plants using a sharp, precise knife.
Beads and Charms
While it’s not required, if you want to add a touch of elegance to your bracelet, consider including some pearl-like beads or delicate charms. They should be no larger than one centimeter, so they don’t overshadow the flowers visually.
Step by Step: How to Create Your Floral Bracelet?
Now we’ve arrived at the heart of the matter. In this section, I will explain the technique for making your bracelet.
👉 If you are creating your jewelry for a special occasion, such as a wedding, I recommend that you practice beforehand. This is especially true for fresh flowers, as bracelets made with this type of material need to be prepared very close to the time they will be worn. Therefore, it’s important to achieve the desired result by the big day.
The video I recommend for learning how to make your bracelet is as follows:
Preparing the Surface
You have two techniques to choose from for support:
- The simplest method: use a single strip of ribbon that is about 2 cm wide and 40 cm long for the entire support. Keep it long so you can trim it later if needed.
- A more refined approach: as shown in the video, select a piece of ribbon about 15 cm long that is wider, and glue it to the center of a thinner ribbon in parallel. This will give you a finer attachment and a larger working surface.
Preparing the Plants
Cut the flowers at the base using scissors or a knife, so you have small pieces that are easy to glue.
When it comes to foliage, depending on the variety, you can choose to keep just the leaf or retain a larger part of it. Consider how you want to arrange them later!
Gluing Foliage
The leaves will serve as the background for your bracelet. This is especially true if you choose to use ivy leaves, which can be arranged back-to-back to create a heart shape, onto which you will then attach your flowers.
Fresh foliage should be adhered using floral adhesive (not hot glue, as it can damage them).
👉 There’s nothing stopping you from adding leaves after the flowers are glued in place, especially if it’s delicate foliage. Just be sure to do it in small touches.
Flower Arrangement
Once the leaf adhesive is dry, you can apply floral adhesive to your fresh flowers or hot glue to your dried and/or preserved flowers, then carefully attach them to your bracelet.
Start with the largest, fully bloomed flower in the center, then surround it with smaller flowers and even some flower buds to create depth. Be sure to create a harmonious arrangement and avoid letting any elements of your bracelet stick out too much.
✔️ As shown in the video, remember to let the floral adhesive air out on the item you are going to glue for at least thirty seconds.
Gluing Beads and Charms
If you want to add small beads to your jewelry, these are the final elements that you will need to glue on.
🛑 As explained in the video, it’s not necessary to place beads in the center of the flowers, as this could detract from the natural and elegant look of your bracelet.
Drying and Preservation
Let your bracelet dry for at least one hour before wearing it.
⌛ If you made it the day before the event where you want to showcase it, you can place it in an airtight plastic container on the top shelf of your refrigerator. This will help keep it fresh without any issues until the next day.

A More Complex Technique for a Finer Finish
If you’ve done any research on this topic, you may have come across tutorials presenting a different technique for making bracelets.
This typically involves the use of aluminum wire and a special floral tape called Floratape.
This is the technique traditionally used by florists. Although it may be a bit more challenging to master, it results in a sturdier and more refined outcome than the gluing technique mentioned earlier.
To make a bracelet using this technique:
- Prepare your plants by leaving about 3 cm of stem, without any leaves.
- Build the structure by cutting a piece of aluminum wire to match the circumference of your wrist. Create a loop of about 1 cm at both ends.
- Starting at one end of the wire, secure your stems by wrapping them with floral tape around your structure. Continue along the entire length of the wire.
- Once the entire structure is covered with flowers and foliage, bend the wire to shape it into a bracelet.
- Finish by threading a ribbon through the two loops made at the beginning. This will serve as the clasp. Your bracelet is complete!
This method is also used to create flower crowns and will be covered in more detail in an upcoming DIY article.
What Floral Accents Should You Pair with Your Flower Bracelet?
Now that you know how to make a flower bracelet, you might want to consider pairing it with another floral accessory.
If you’re attending a wedding as a couple, especially if you’re both members of the wedding party, I recommend making a boutonniere for the gentleman using the same flowers and design as the wristlet. Does this idea intrigue you? Check out our DIY article on boutonnieres to learn how to create this floral accessory yourself.
If you are a bridesmaid, you can ask the bride if she is okay with you wearing a flower crown. If she agrees, choose a crown that is matching your bracelet.

Creating a floral crown takes more time and patience than making a bracelet. If you’re not ready to dive into this project right away, you can check out our selection of various artificial floral crowns.
You’re sure to find a crown that matches your bracelet among our many styles.
You now know everything there is to know about creating and/or wearing a beautiful floral bracelet for an event. This small but elegant detail will make a big difference on that day and add a lot of elegance to your look!