
Would you like to have a floral arch for your wedding? Are you wondering how to create one? What shape of arch should you choose, and which flowers are suitable for this type of decoration?
You’ve come to the right place.
As a florist specializing in events, I’ve noticed that floral arches have made a strong comeback in recent years. These stunning decorations are truly a fantastic way to create an exceptional backdrop for your wedding ceremony.
However, having an arch built usually requires a substantial budget. That’s why today I’m going to show you how to create one yourself.
To create an arch for your wedding, the first step is to find a support in the shape of your choice. Next, soak hydrophilic foam blocks and attach them to the arch using waterproof adhesive. Then, simply insert your greenery followed by your flowers. To finish off your arch, you can decorate it with a long strip of fabric, candles, wooden crates, and more…
Want to learn more? Keep reading to discover:
- What a floral arch brings to a wedding décor,
- How to choose your base structure,
- The flowers you can use to create this décor,
- The professionals’ technique for making a floral arch,
- And plenty of practical tips for achieving a stunning result!
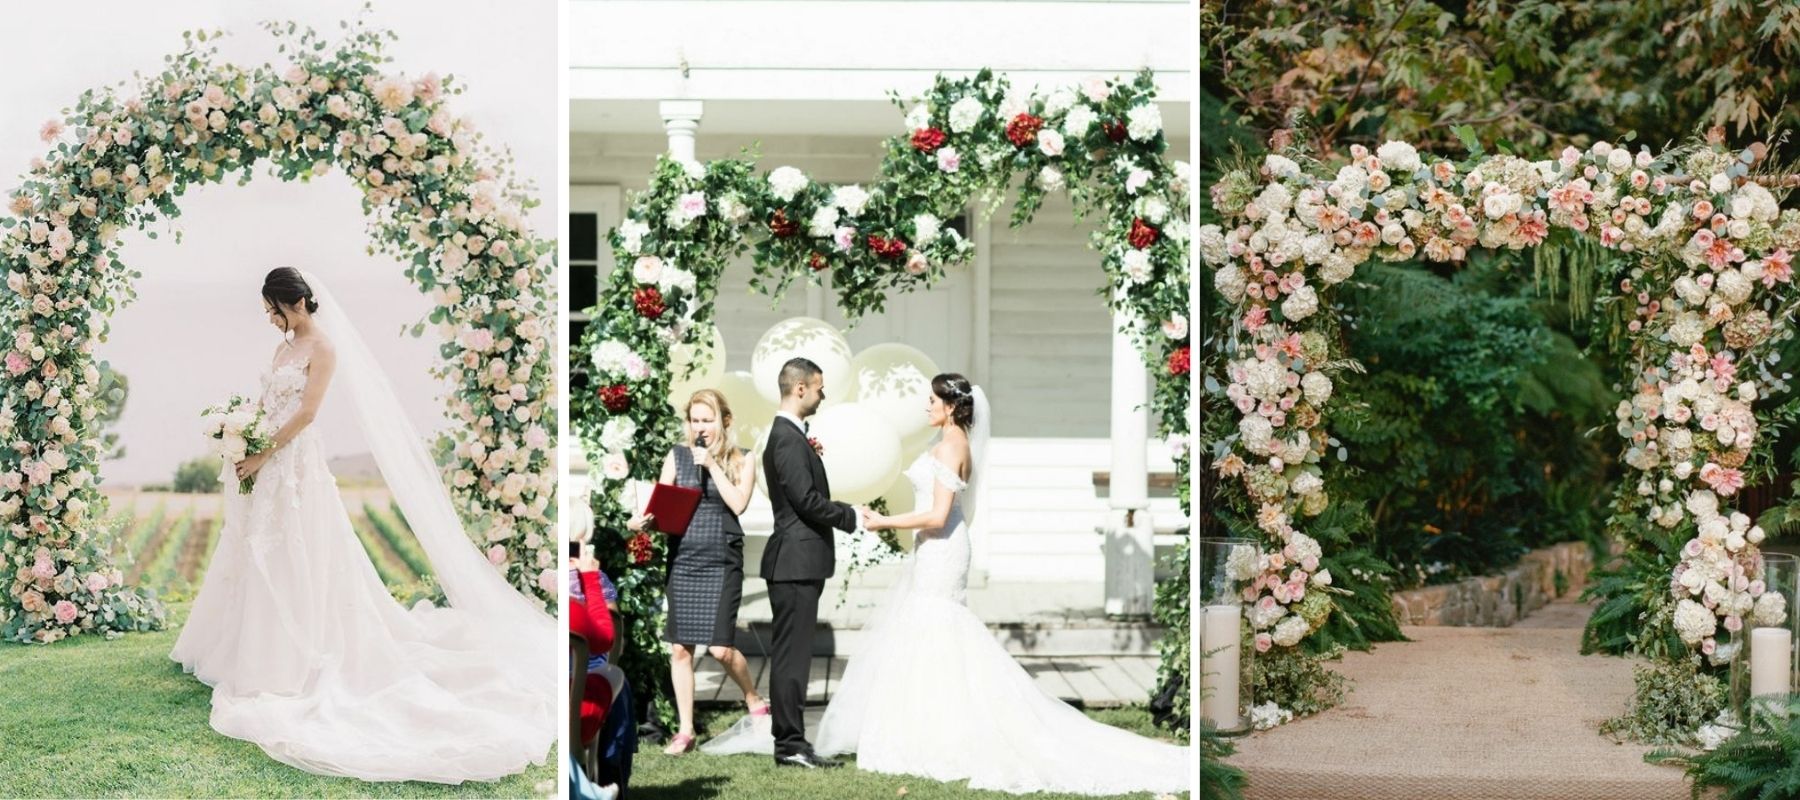
Why a Flower Arch for My Wedding?
Stunning and romantic, flower arches have captured the hearts of engaged couples in recent years. They create an exceptional backdrop for your ceremony, enchanting your guests and providing a wonderful opportunity for beautiful souvenir photos.
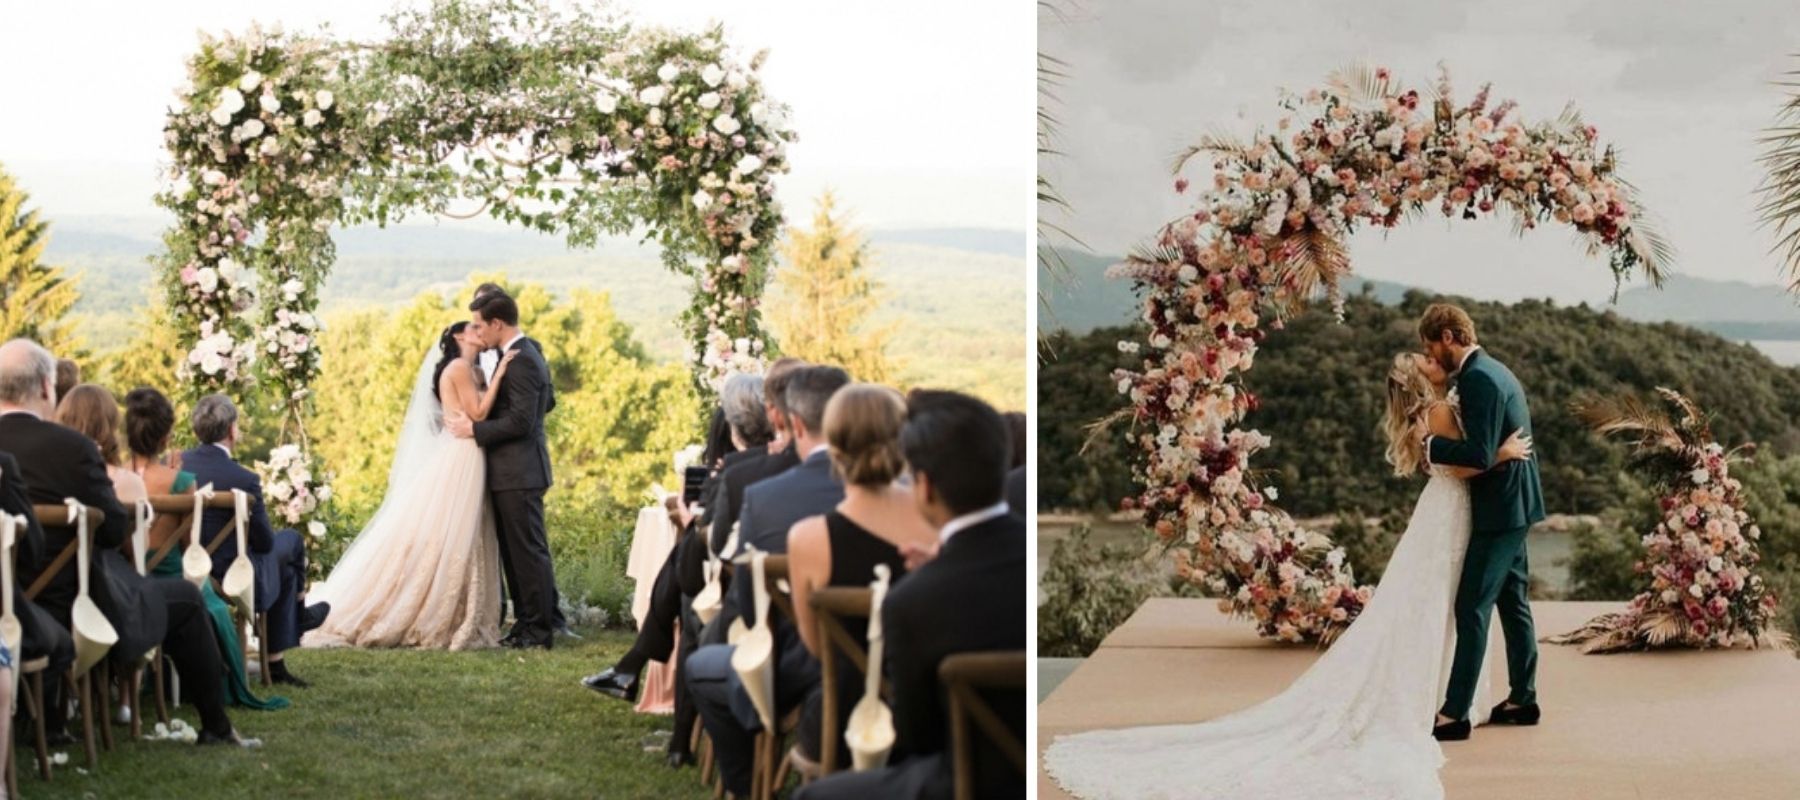
Traditionally, the arch is placed at the end of the aisle so that the couple and the officiant can stand underneath it for the duration of the ceremony. However, there are times when the arch is shorter than the couple, and they end up standing in front of it.
If you’re having your wedding in a church or inside a town hall, it can sometimes be challenging to set up an arch there. In this case, you can place the arch near the area where cocktails will be served, so you and your guests can capture memorable moments of your wedding in front of it.
Finally, in the context of a grand wedding setup, the floral arch can also serve as the “entrance” to your reception venue: all of the guests will walk underneath it to enter the celebration area.
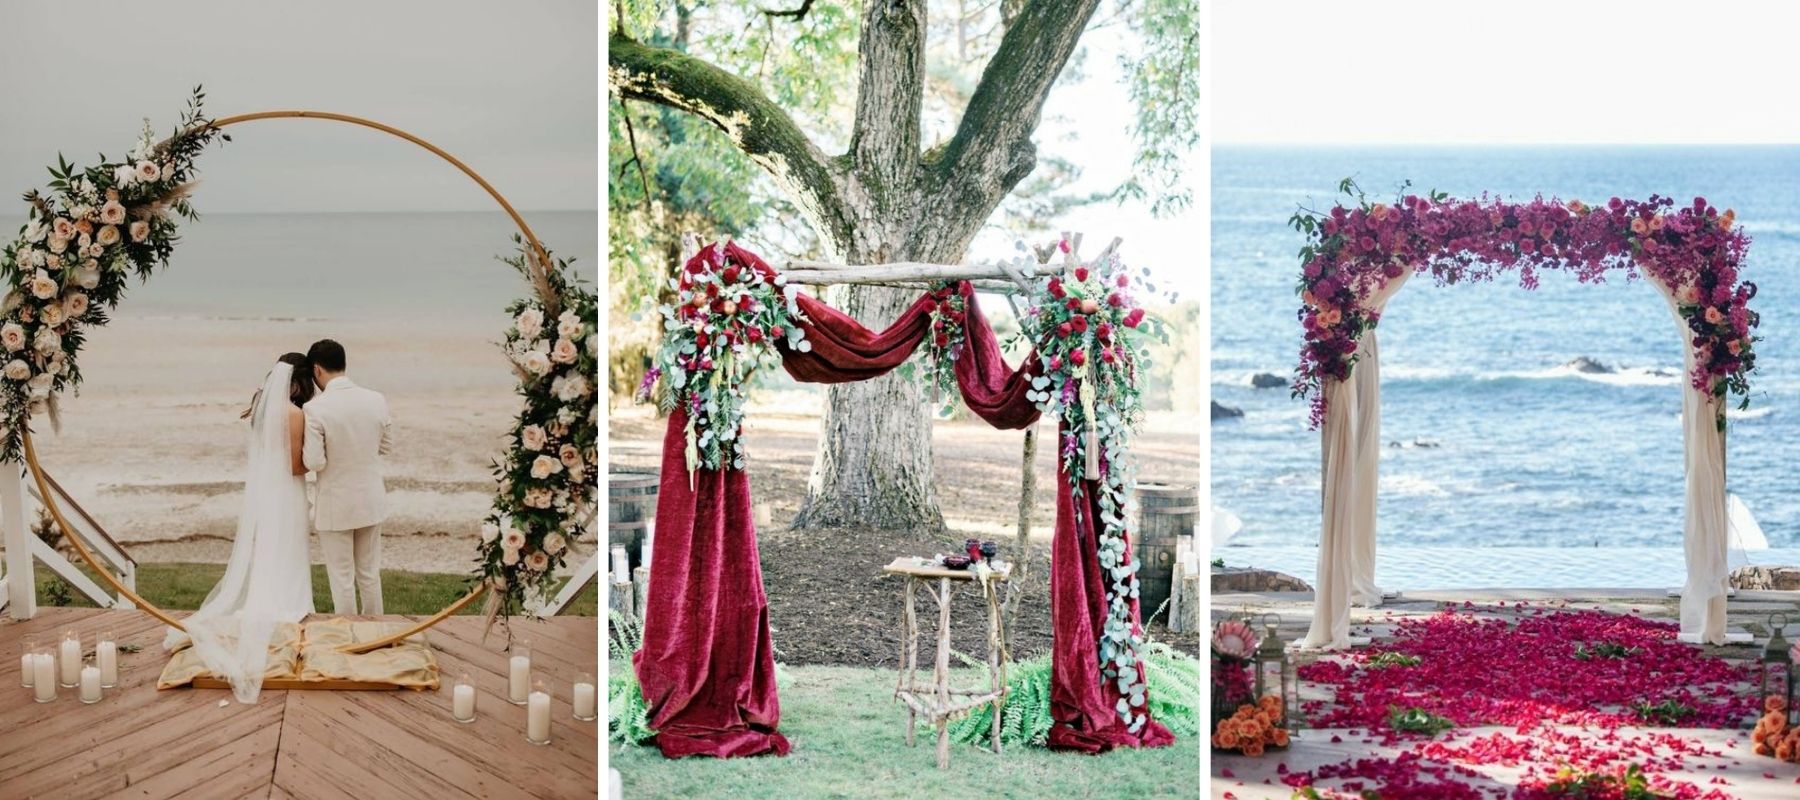
How to Choose Your Arch (Shape, Material)?
Do you want to decorate your wedding with an arch? There are many options available to you, both in terms of materials and shapes.
The Material
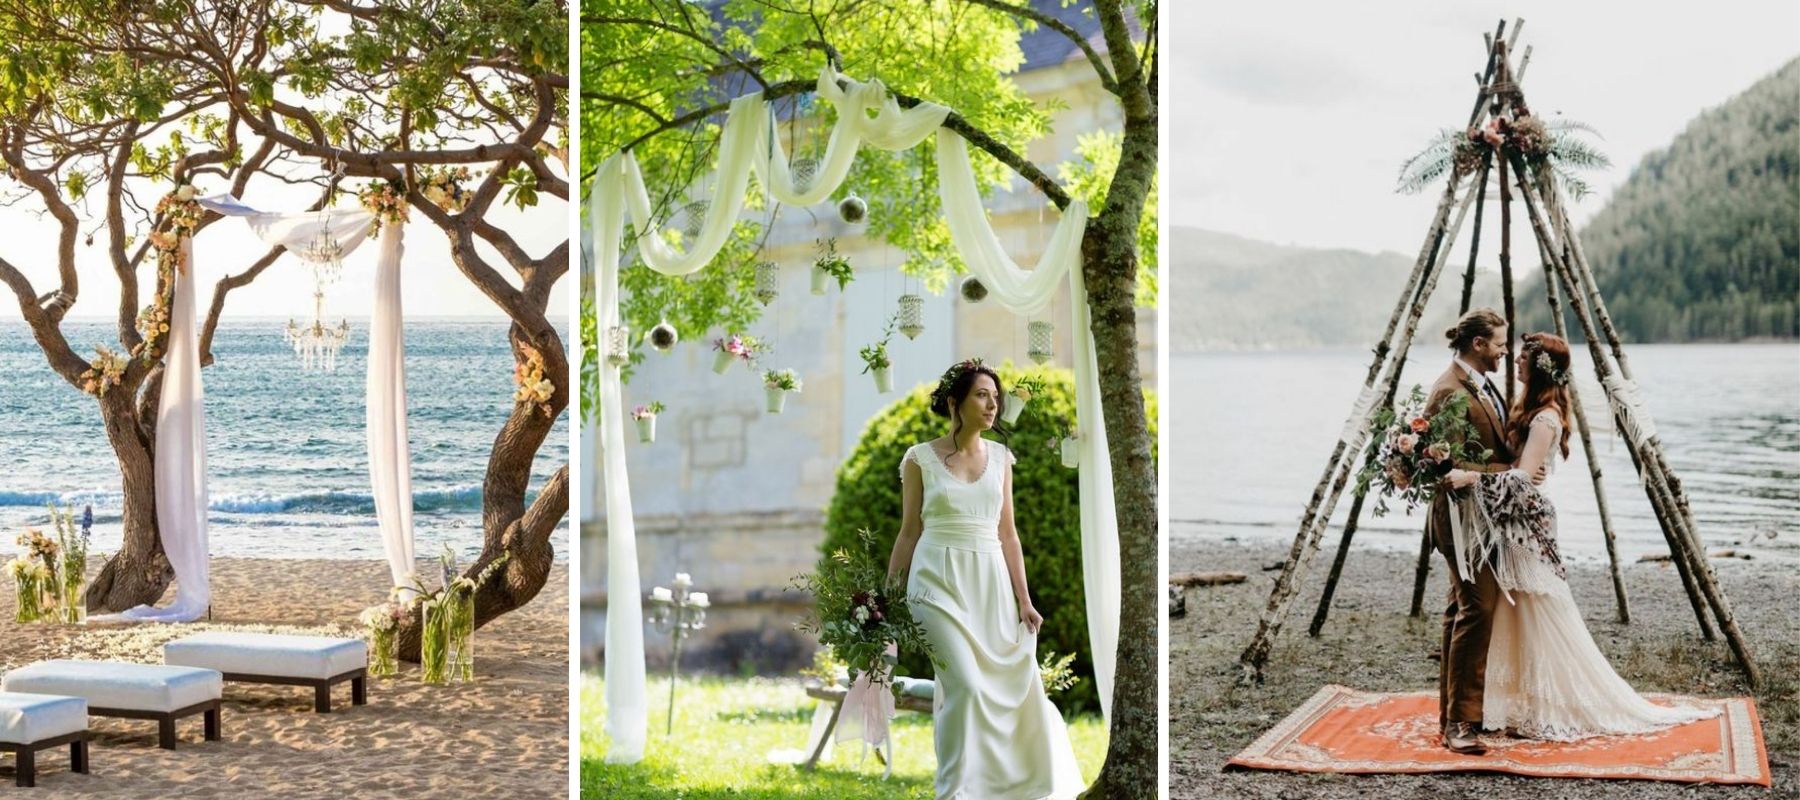
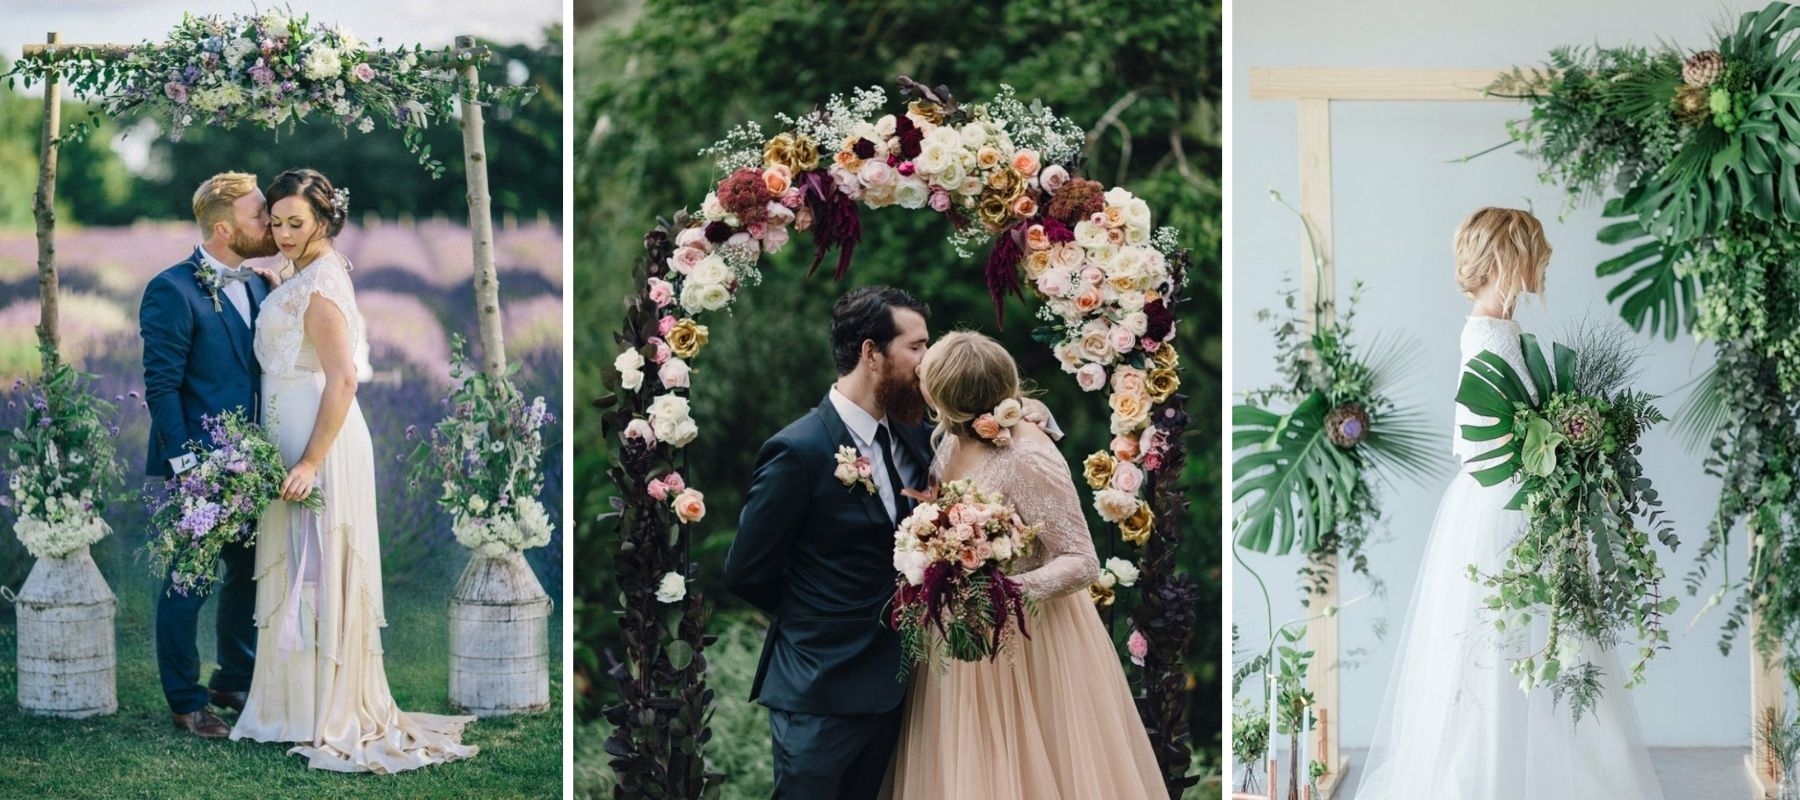
Your arch can be made of either metal or wood. Metal structures have the advantage of being sturdy and lightweight. They are also more affordable than wooden ones, unless you’re considering wrought iron. Simple lightweight metal arches are particularly suitable if you want to fully cover the structure with flowers.
Wooden arches are generally more aesthetic and can remain visible beneath the floral decorations. They are well-suited for a more subtle floral arrangement. Wood, being a noble material, pairs nicely with bohemian and rustic themes, adding an extra natural element to the decor.

The Shape
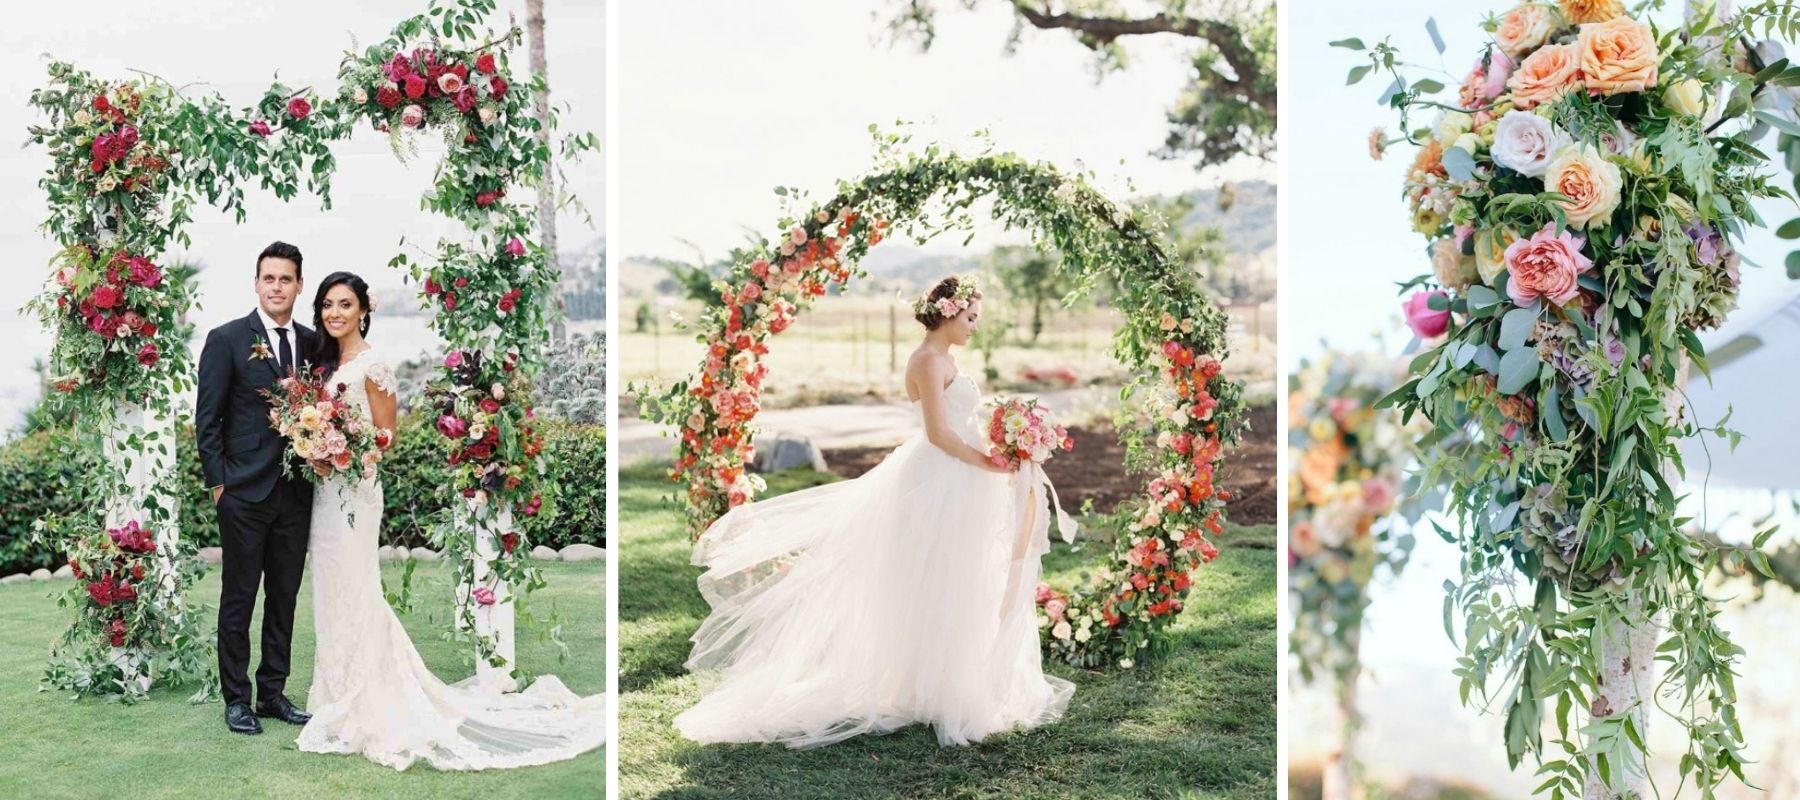
Traditionally, arches are typically rectangular and tall: this allows the couple to stand beneath it while being beautifully framed by the decor. However, we’re increasingly seeing a variety of different geometric shapes, including:
- the circle: perfect for photos on the beach or in the water. It highlights the couple and adds a touch of softness to the decor,
- the triangle: this shape is more unique than the previous ones and allows for a simple setup, featuring two flowered areas.
👉 If you’re celebrating your wedding outdoors in a wooded park, consider the possibility of creating an arch directly on a tree: in this case, the shape can be formed by wrapping fabrics around the branches, letting them drape down at the ends and near the trunk. This type of decor is very romantic and only requires a few flowers to achieve a stunning natural effect!
What Flowers to Use on a Wedding Arch?
Since these are large decorations, the arches will typically be enhanced with bold flowers such as:
- The Hydrangea,
- The Snapdragon,
- The Rose,
- The Peony,
- The Gerbera,
- The Lily,
- Exotic flowers: Orchid, Anthurium, Bird of Paradise…
- Dried grasses: Pampas Grass, Miscanthus, …
In any case, your arch decoration should reflect the rest of your decor. The colors should match, and the flowers should be the same ones found in your centerpieces, your bridal bouquet, and your car decoration…
🌿 Foliage is essential for creating an arch; it adds volume and depth. The more foliage you include, the less you’ll need to rely on flowers for impact. Some people even opt for a more understated arch, adorned only with greenery. Eucalyptus has been very trendy in recent years, but if you can’t forage it yourself, it can be quite expensive. Feel free to mix it with other types of foliage (like Oak, Pistachio, or Laurel) to achieve a very natural look!
Discover Two Techniques to Bloom Your Archway
When decorating an arch, the technique used depends on the type of floral decoration desired. Specifically, whether you want to cover the entire arch with flowers or simply attach two or three floral arrangements, the approach will vary.
☀️ If the arch is set up outdoors and it’s hot, I recommend that you set it up as close to the ceremony as possible, ideally a few hours beforehand. If that’s not feasible for you, you can set it up the day before, but in that case, it should be placed in the shade or even indoors until the ceremony.
Complete Blooming
If you want to completely cover your flower arch, you’ll need to secure water-retaining foam blocks all over the arch, which will be used to insert the flowers and foliage.
👉 These foam blocks, usually available in green or black, can be found at florists, specialized websites for floral supplies, or stores dedicated to crafts and hobbies.
For added convenience, you can also attach a moss garland like this one around the entire arch, specifically designed for this purpose.
💧 Before securing it, you need to wet the foam. To do this, fill a large container with water and gently place the foam on the surface without pushing it down. Wait for it to sink to the bottom before removing it.
Next, secure the foam all around the arch using waterproof tape. Florists typically use this tape, but you can definitely use craft tape or something similar as well.
🔸 Next comes the step of adding greenery:
Start by removing all the leaves from your stems, making sure that the part that will be buried in the moss is free of foliage. Begin with the sides and cover the front last.
🔸 Finally, you can move on to arranging the flowers by inserting each flower into the foam one by one. To create an even display, I recommend working variety by variety, starting with the largest blooms.
➡️ For example, start by inserting your hydrangeas evenly throughout. Next, add the roses, and finally, include smaller flowers like baby’s breath.
Focused Blooming
Do you prefer to decorate your arch with several large bouquets attached to it? This is an option that many couples often choose, especially because it is much more cost-effective than the previous one.
Typically, regardless of the shape of the arch, we choose to create two compositions:
- that will be set at different heights, one positioned towards the top left and the other towards the bottom right, to frame the couple,
- that will be of different sizes, with the one in the top left typically being 1.5 times larger than the one in the bottom right,
- that will be decorated with the same flowers and greenery, maintaining a consistent theme to create a sense of unity.
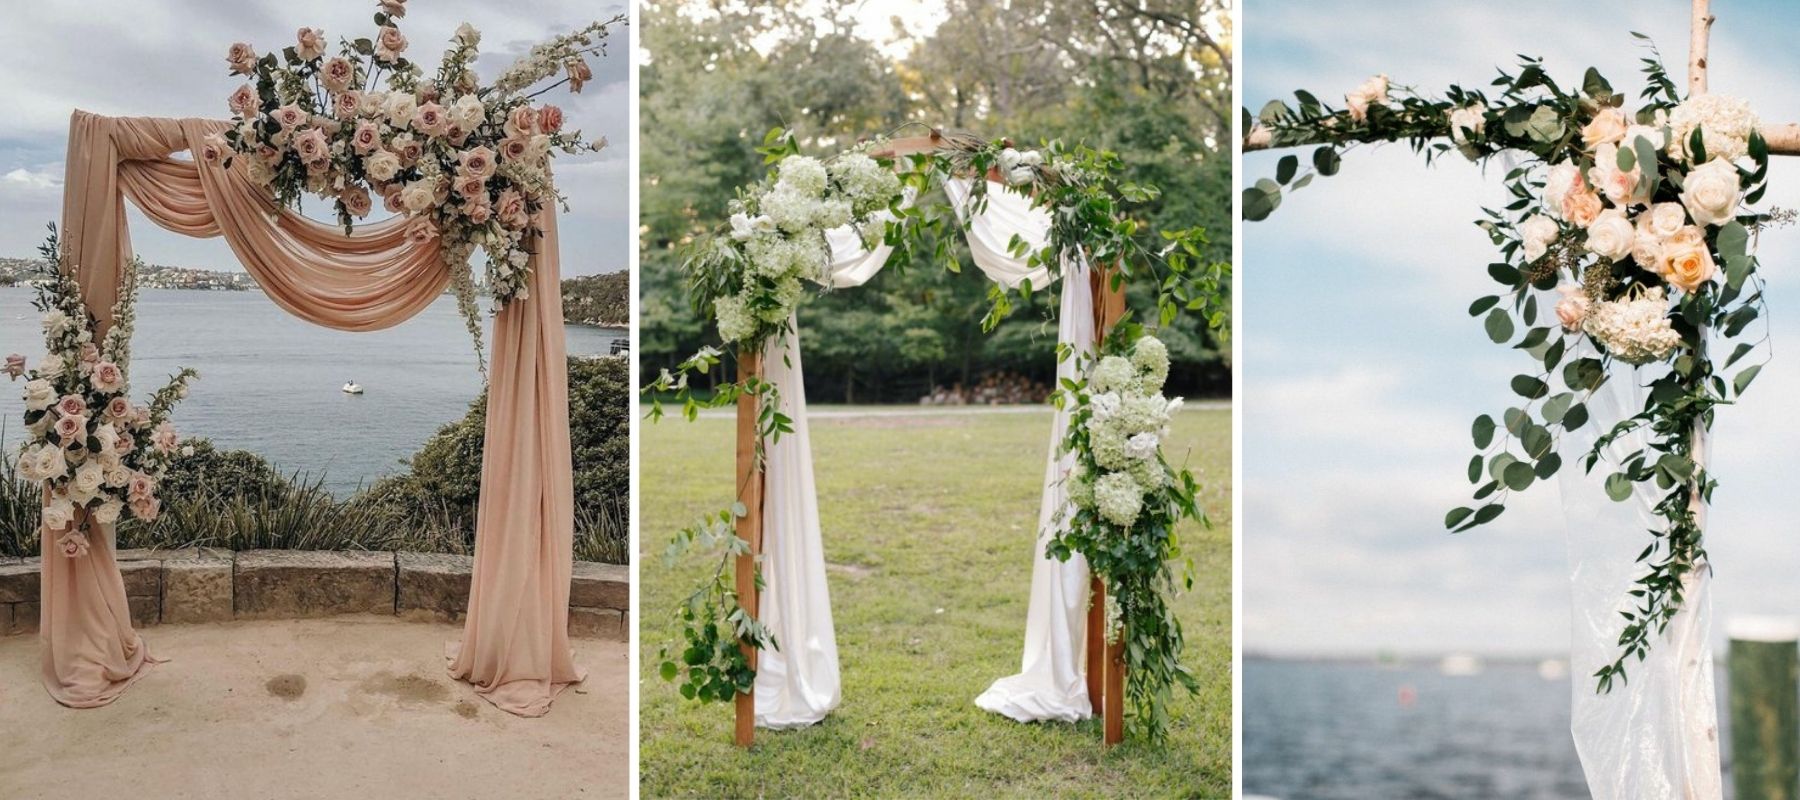
To create this decoration, you will need two blocks of hydrophilic foam, which you will moisten and secure as described in the previous section. Once these are firmly attached to the arch, you can start adding greenery using foliage to completely cover the foam.
👉 To create a harmonious and aesthetically pleasing composition, always poke towards the center of your foam cake.
Once the foliage is secured, you can move on to adding the flowers, just as mentioned earlier. When creating your two arch arrangements, always remember to compare them to ensure they are well-coordinated and create a cohesive look. The result will be even more beautiful!
➡️For those who do not have hydrophilic foam and can create an arch a few minutes before the ceremony, you can follow the steps shown in this video:
🛑 However, keep in mind that if the flowers aren’t placed in foam, they are likely to wilt very quickly, especially in warm weather.
Final Step: The Finishing Touches!
Once the plants are attached to the arch, it’s time to finalize your decor. For this, I recommend having a large piece of fabric in a color that matches your decor, along with a few elements related to your theme or the style of your wedding.
For example, you might consider:
- placing candles (electric ones to minimize fire risk) along the aisle or illuminated preserved roses under a bell jar,
- decorating the base of the arch with wine or fruit crates,
- laying down rugs or decorative fabrics on the ground,
- scattering rose petals on the ground to create a magical atmosphere for your union,
- creating a true romantic decor with vintage garden furniture…
I hope this guide has helped you create a stunning floral arch for a ceremony or any other event. This beautiful decoration requires some preparation, but it always leaves a lasting impression on those fortunate enough to experience it.
If you don’t have time to create an arch or if you’re indoors, a great trick is to replace the arch with a floral wall, which will have the same effect! This is also perfect for decorating a photo booth, for example. To get a better idea of the outcome, check out our floral walls in our online shop!